This article was also published simultaneously on my personal website, which includes links to download files. Click on this line to access it.
In August of this year, I posted a disassembly of the Yaesu FTDX10, which mentioned that the built-in screen had some dead pixels and some bright pixels. Therefore, I decided to replace it with a domestic screen. After replacing it, everything has been working normally until now. Now, I'm sharing some methods for replacing the screen and some important notes.
Since "replacement" is required, the following conditions must be met:
* The display should function normally and provide similar or better visual results.
* The touchscreen should function normally without interference from other components.
* The connection should be stable, allowing for long-term normal use.
Based on the above requirements, we will analyze the options sequentially.
First, it displays normally. Generally, this requires matching the driver IC and the wiring order. You can find the wiring order in the DX10 repair manual.

Based on the user experience, it is likely that the DX10 uses a 5-inch RGB touchscreen with resistive technology and an IPS panel. The resolution is 800x480. This makes finding the appropriate product easier; I can simply search for "RGB screen" on Taobao and find related products. (The following diagram was provided by the seller.)

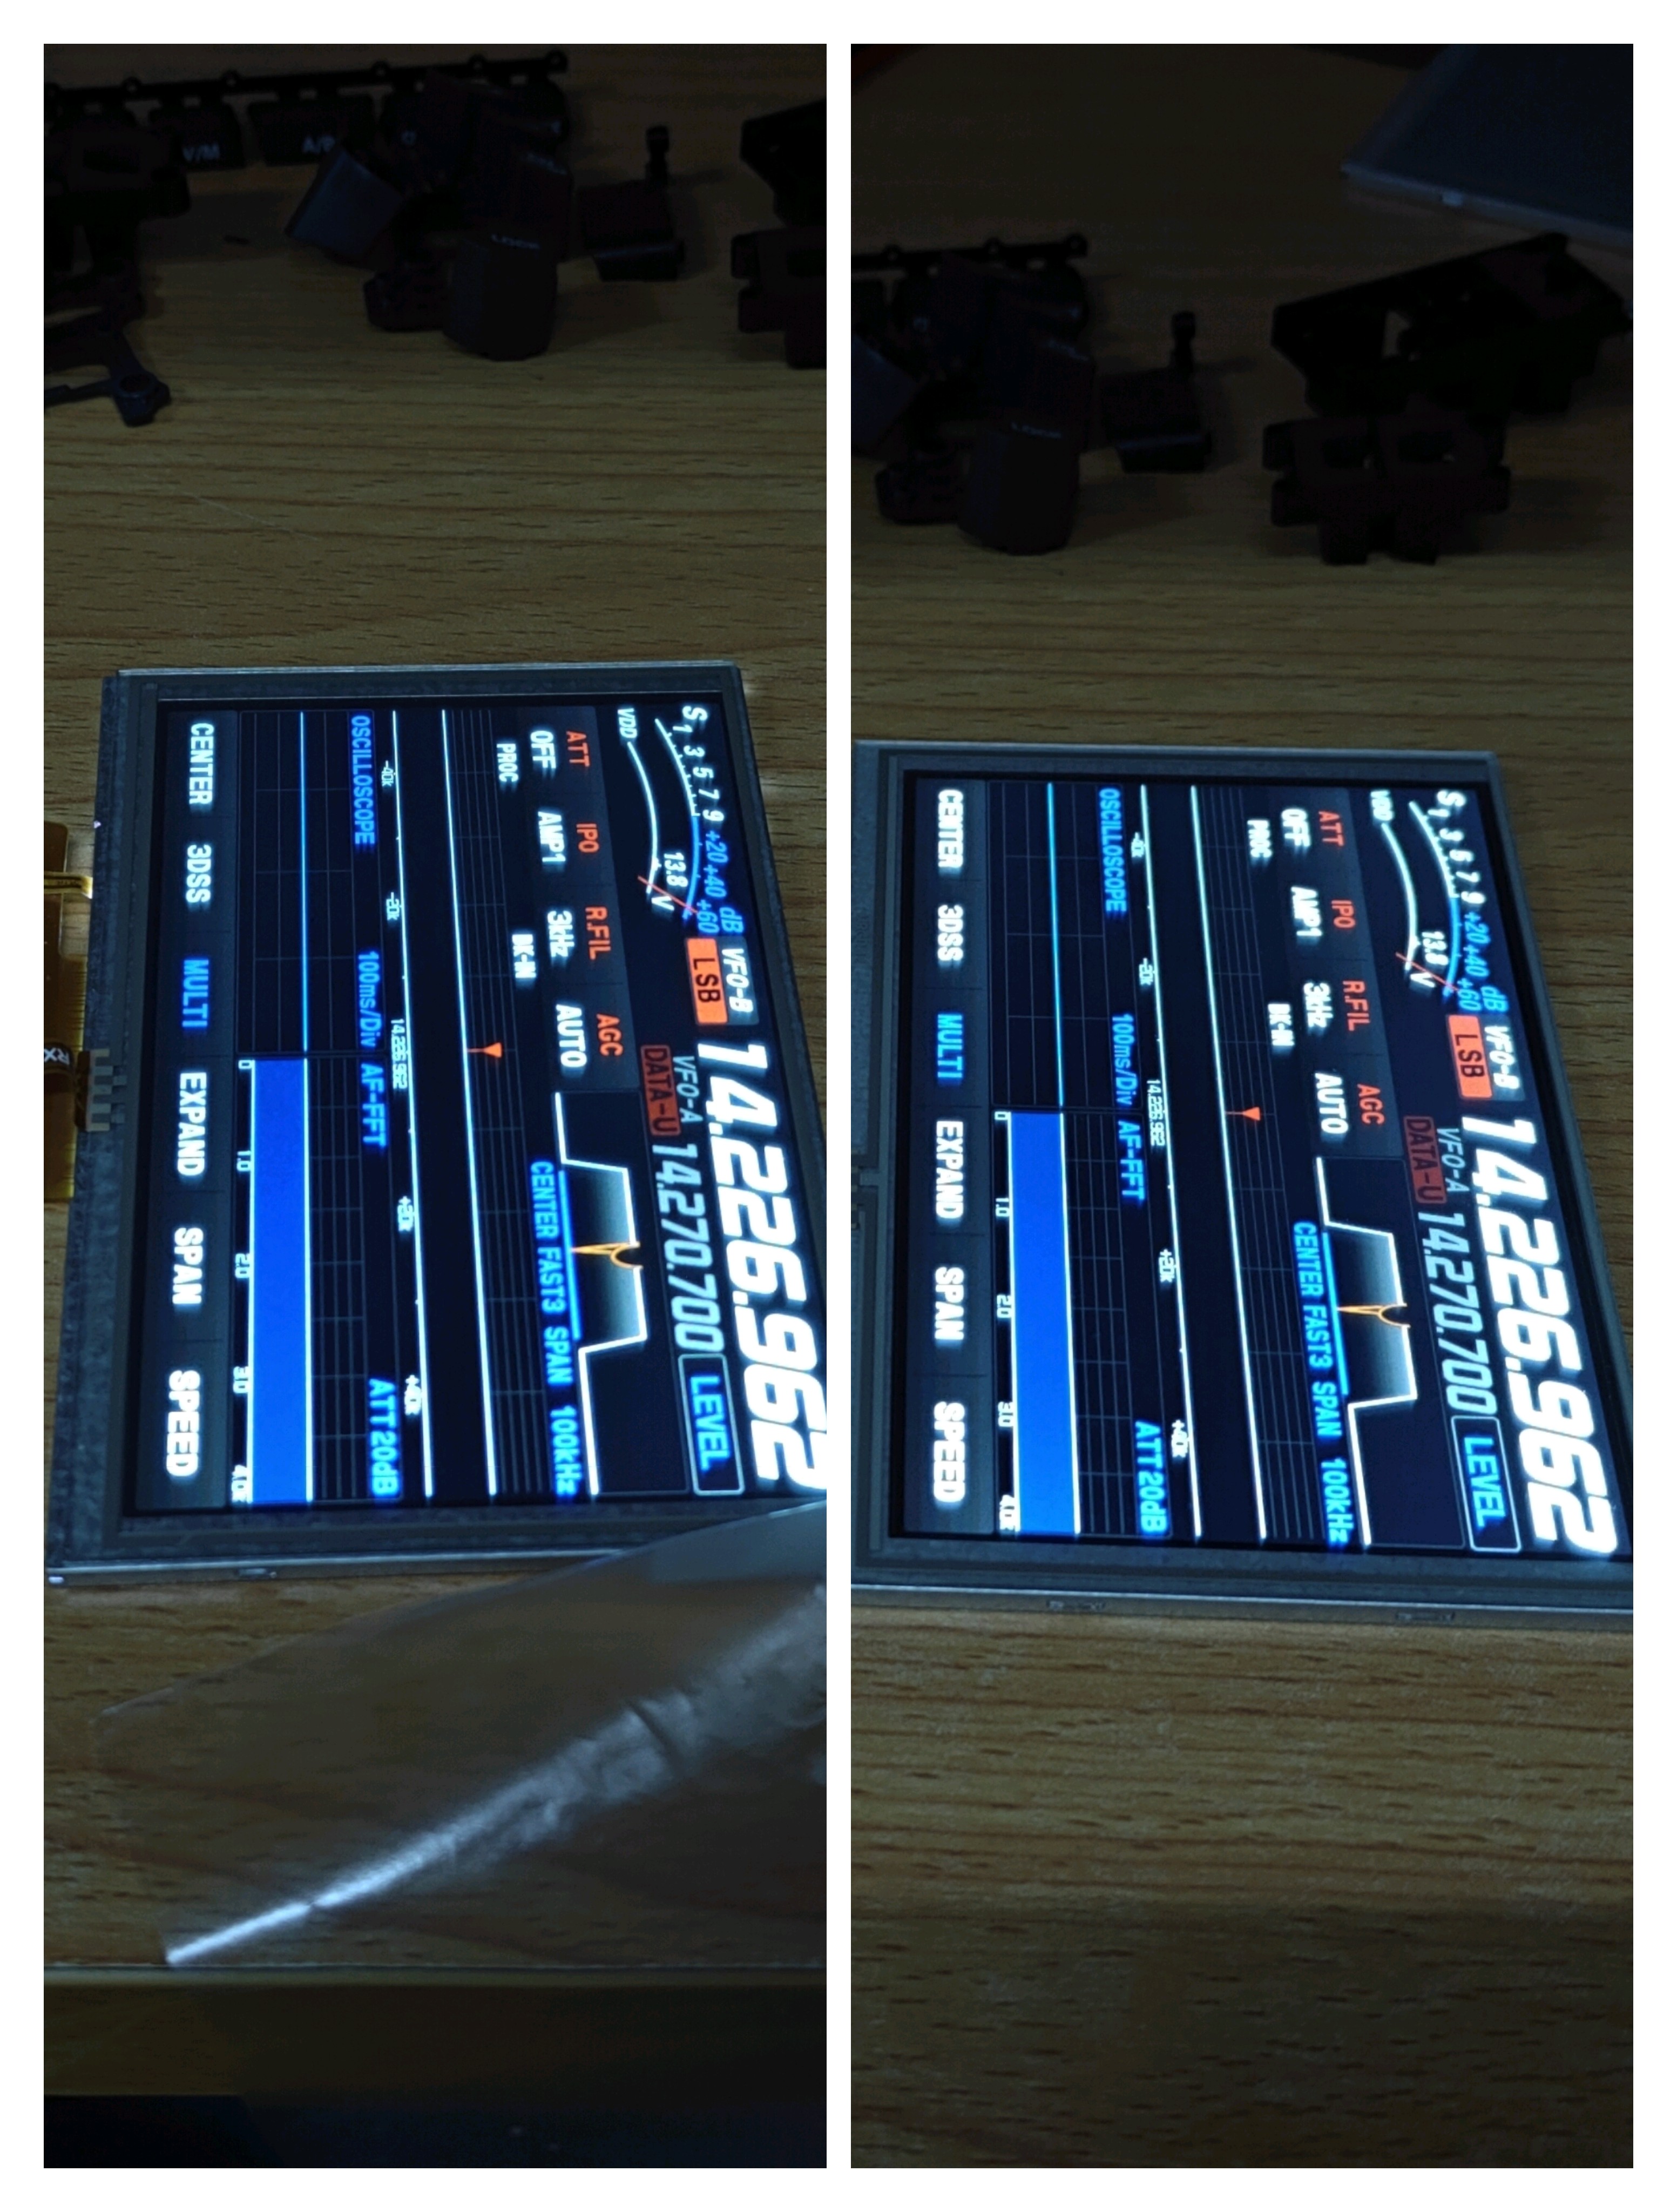
Next, let's look at the display effect. Since DX10 has certain outdoor usage properties, a high-brightness screen was used, estimated to be around 1500 cd. This is likely the type of screen that factories could purchase. I took a brightness comparison photo after receiving it. Can you tell the difference between the replacement and the original screen (using your phone in professional mode with fixed settings)?
When I excitedly installed the replacement screen, I discovered a problem with the touch function – the touch was reversed horizontally; that is, tapping on the left side resulted in a response from the right. The built-in screen calibration could only correct errors up to 1 centimeter. After rechecking the cable order, I found that the DX10 touchscreen cable order differed from the available screen cable orders, requiring an adapter.
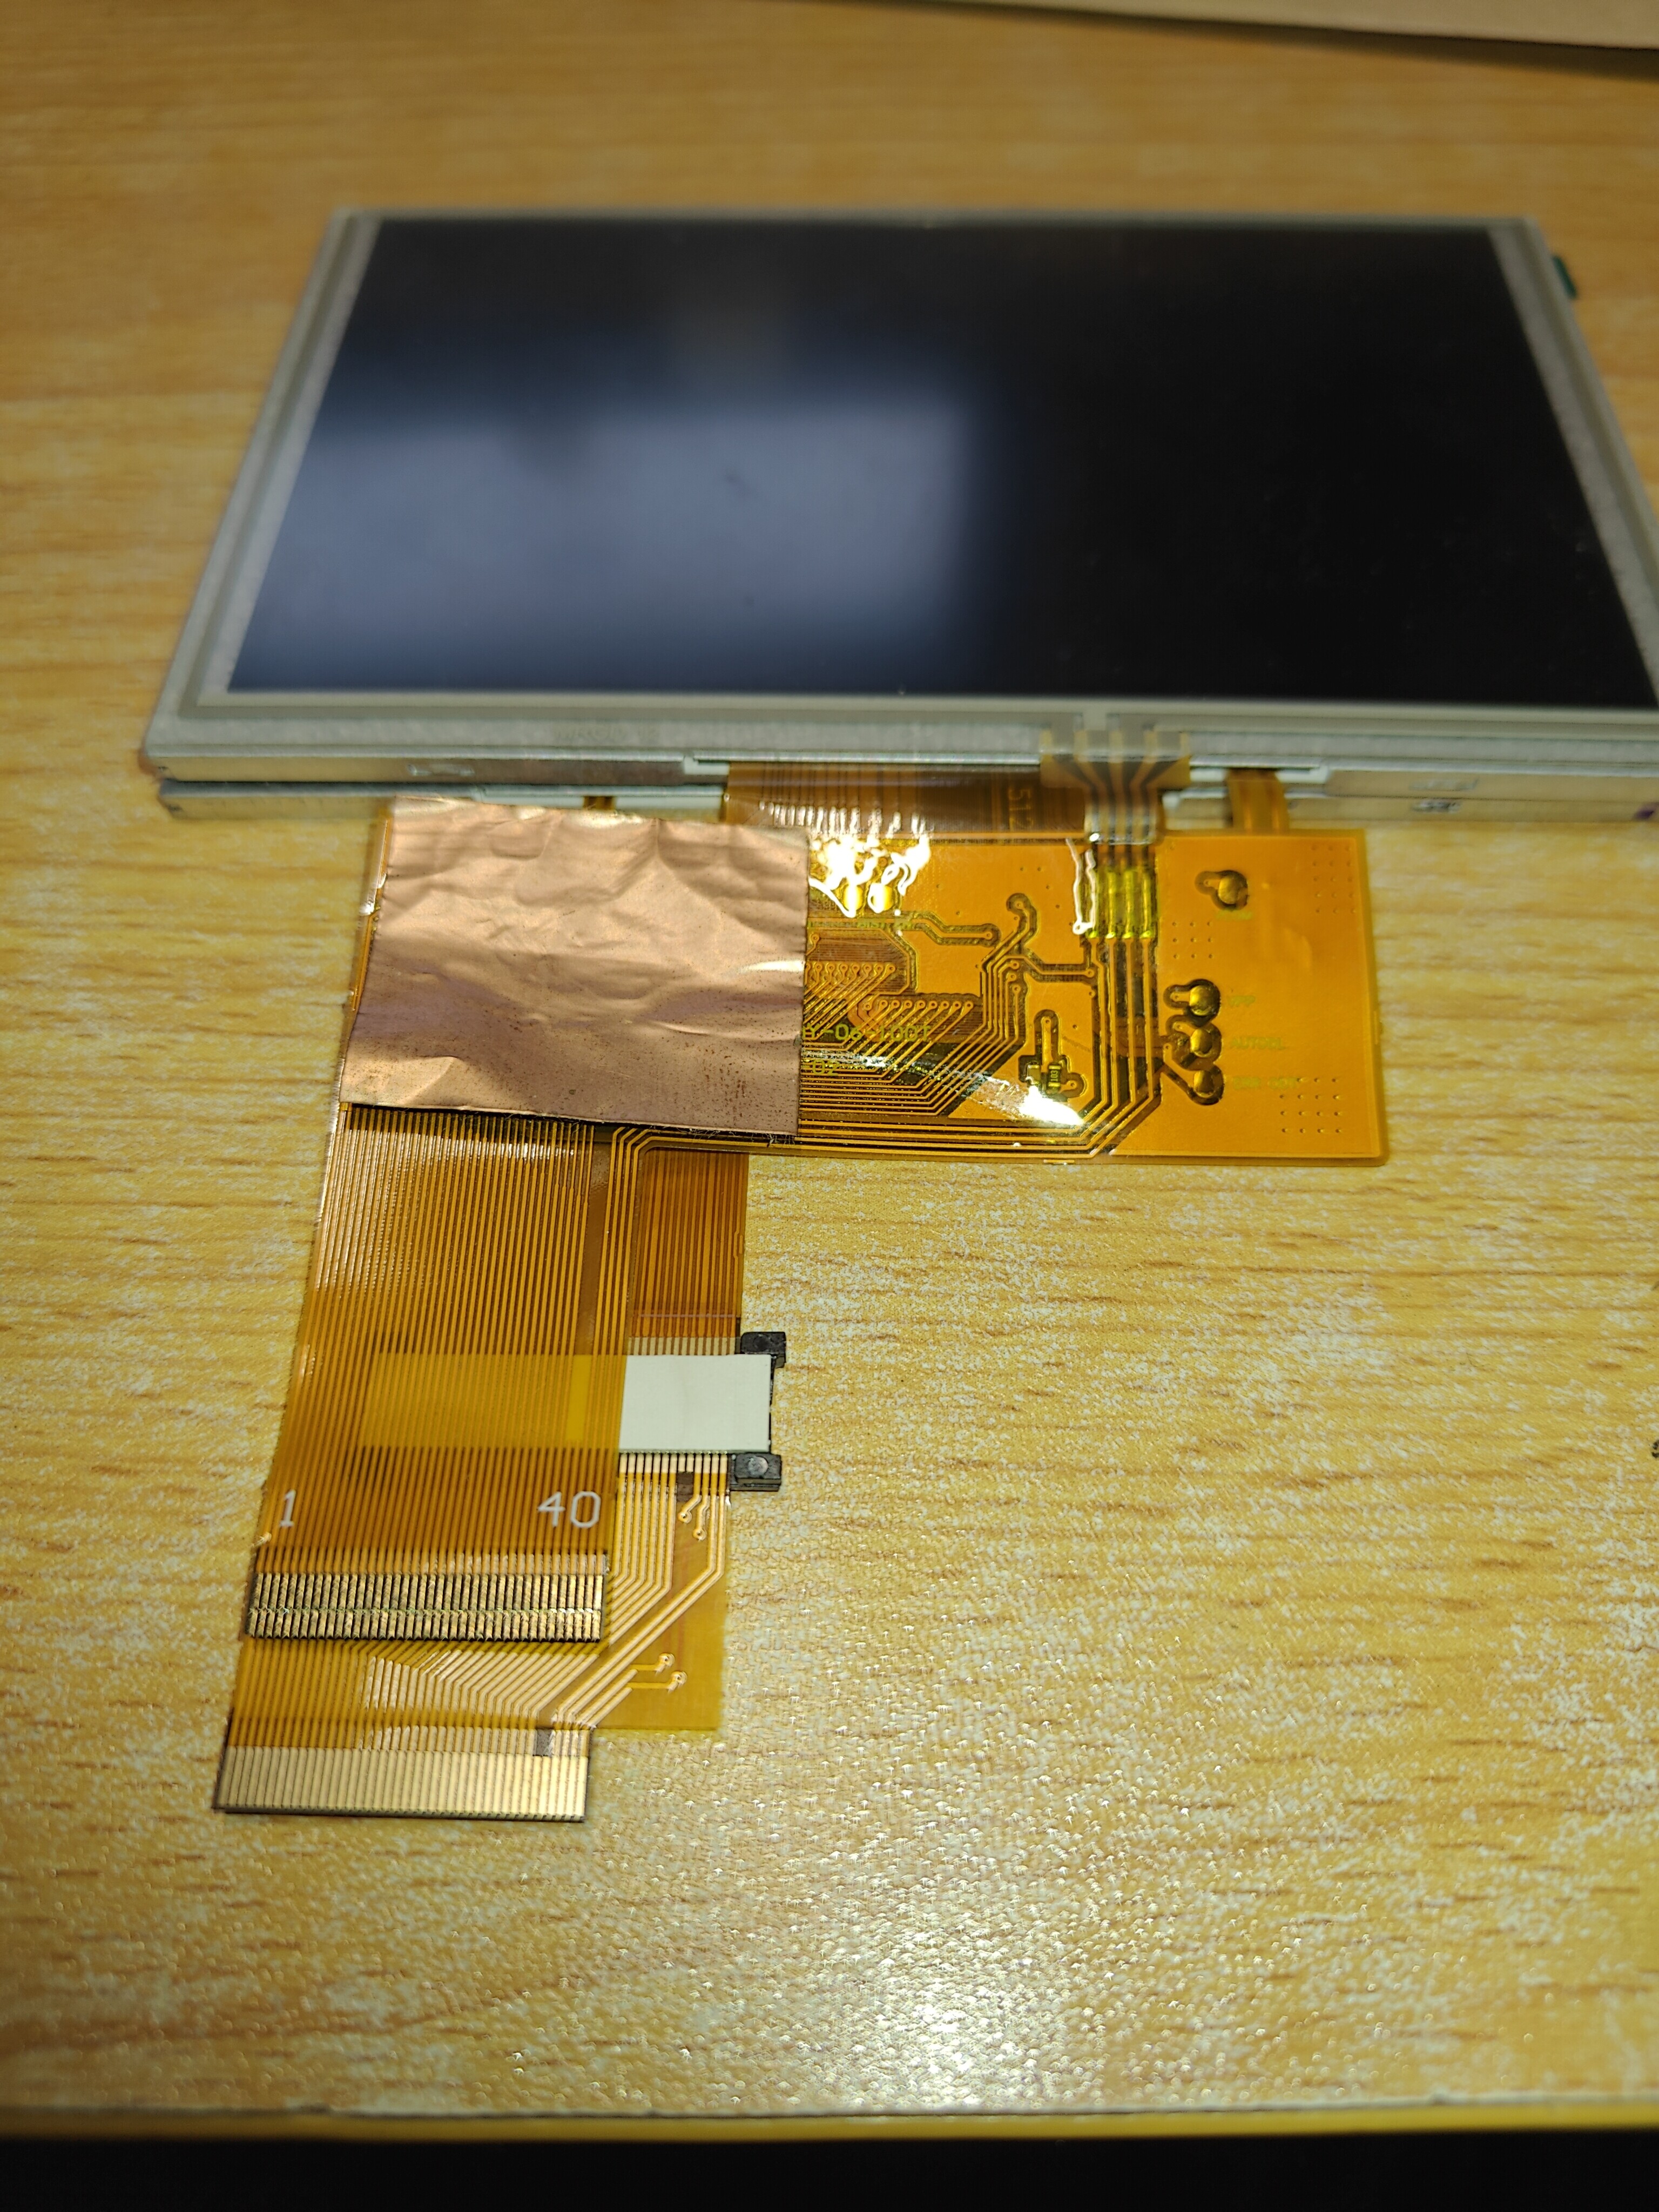
The space allocated for the screen inside the machine is very small, so inserting a circuit board and using an adapter would not be suitable. I suddenly remembered that Lilin had shown me advertisements for FPC samples, and after searching, I found one. Based on the connection of the lines, I drew an FPC adapter, and the connection between the screen's cable and the adapter was made using small connectors. Also, considering the difference in position between the cables and the original screen, I also performed a shift. The final product is as follows:
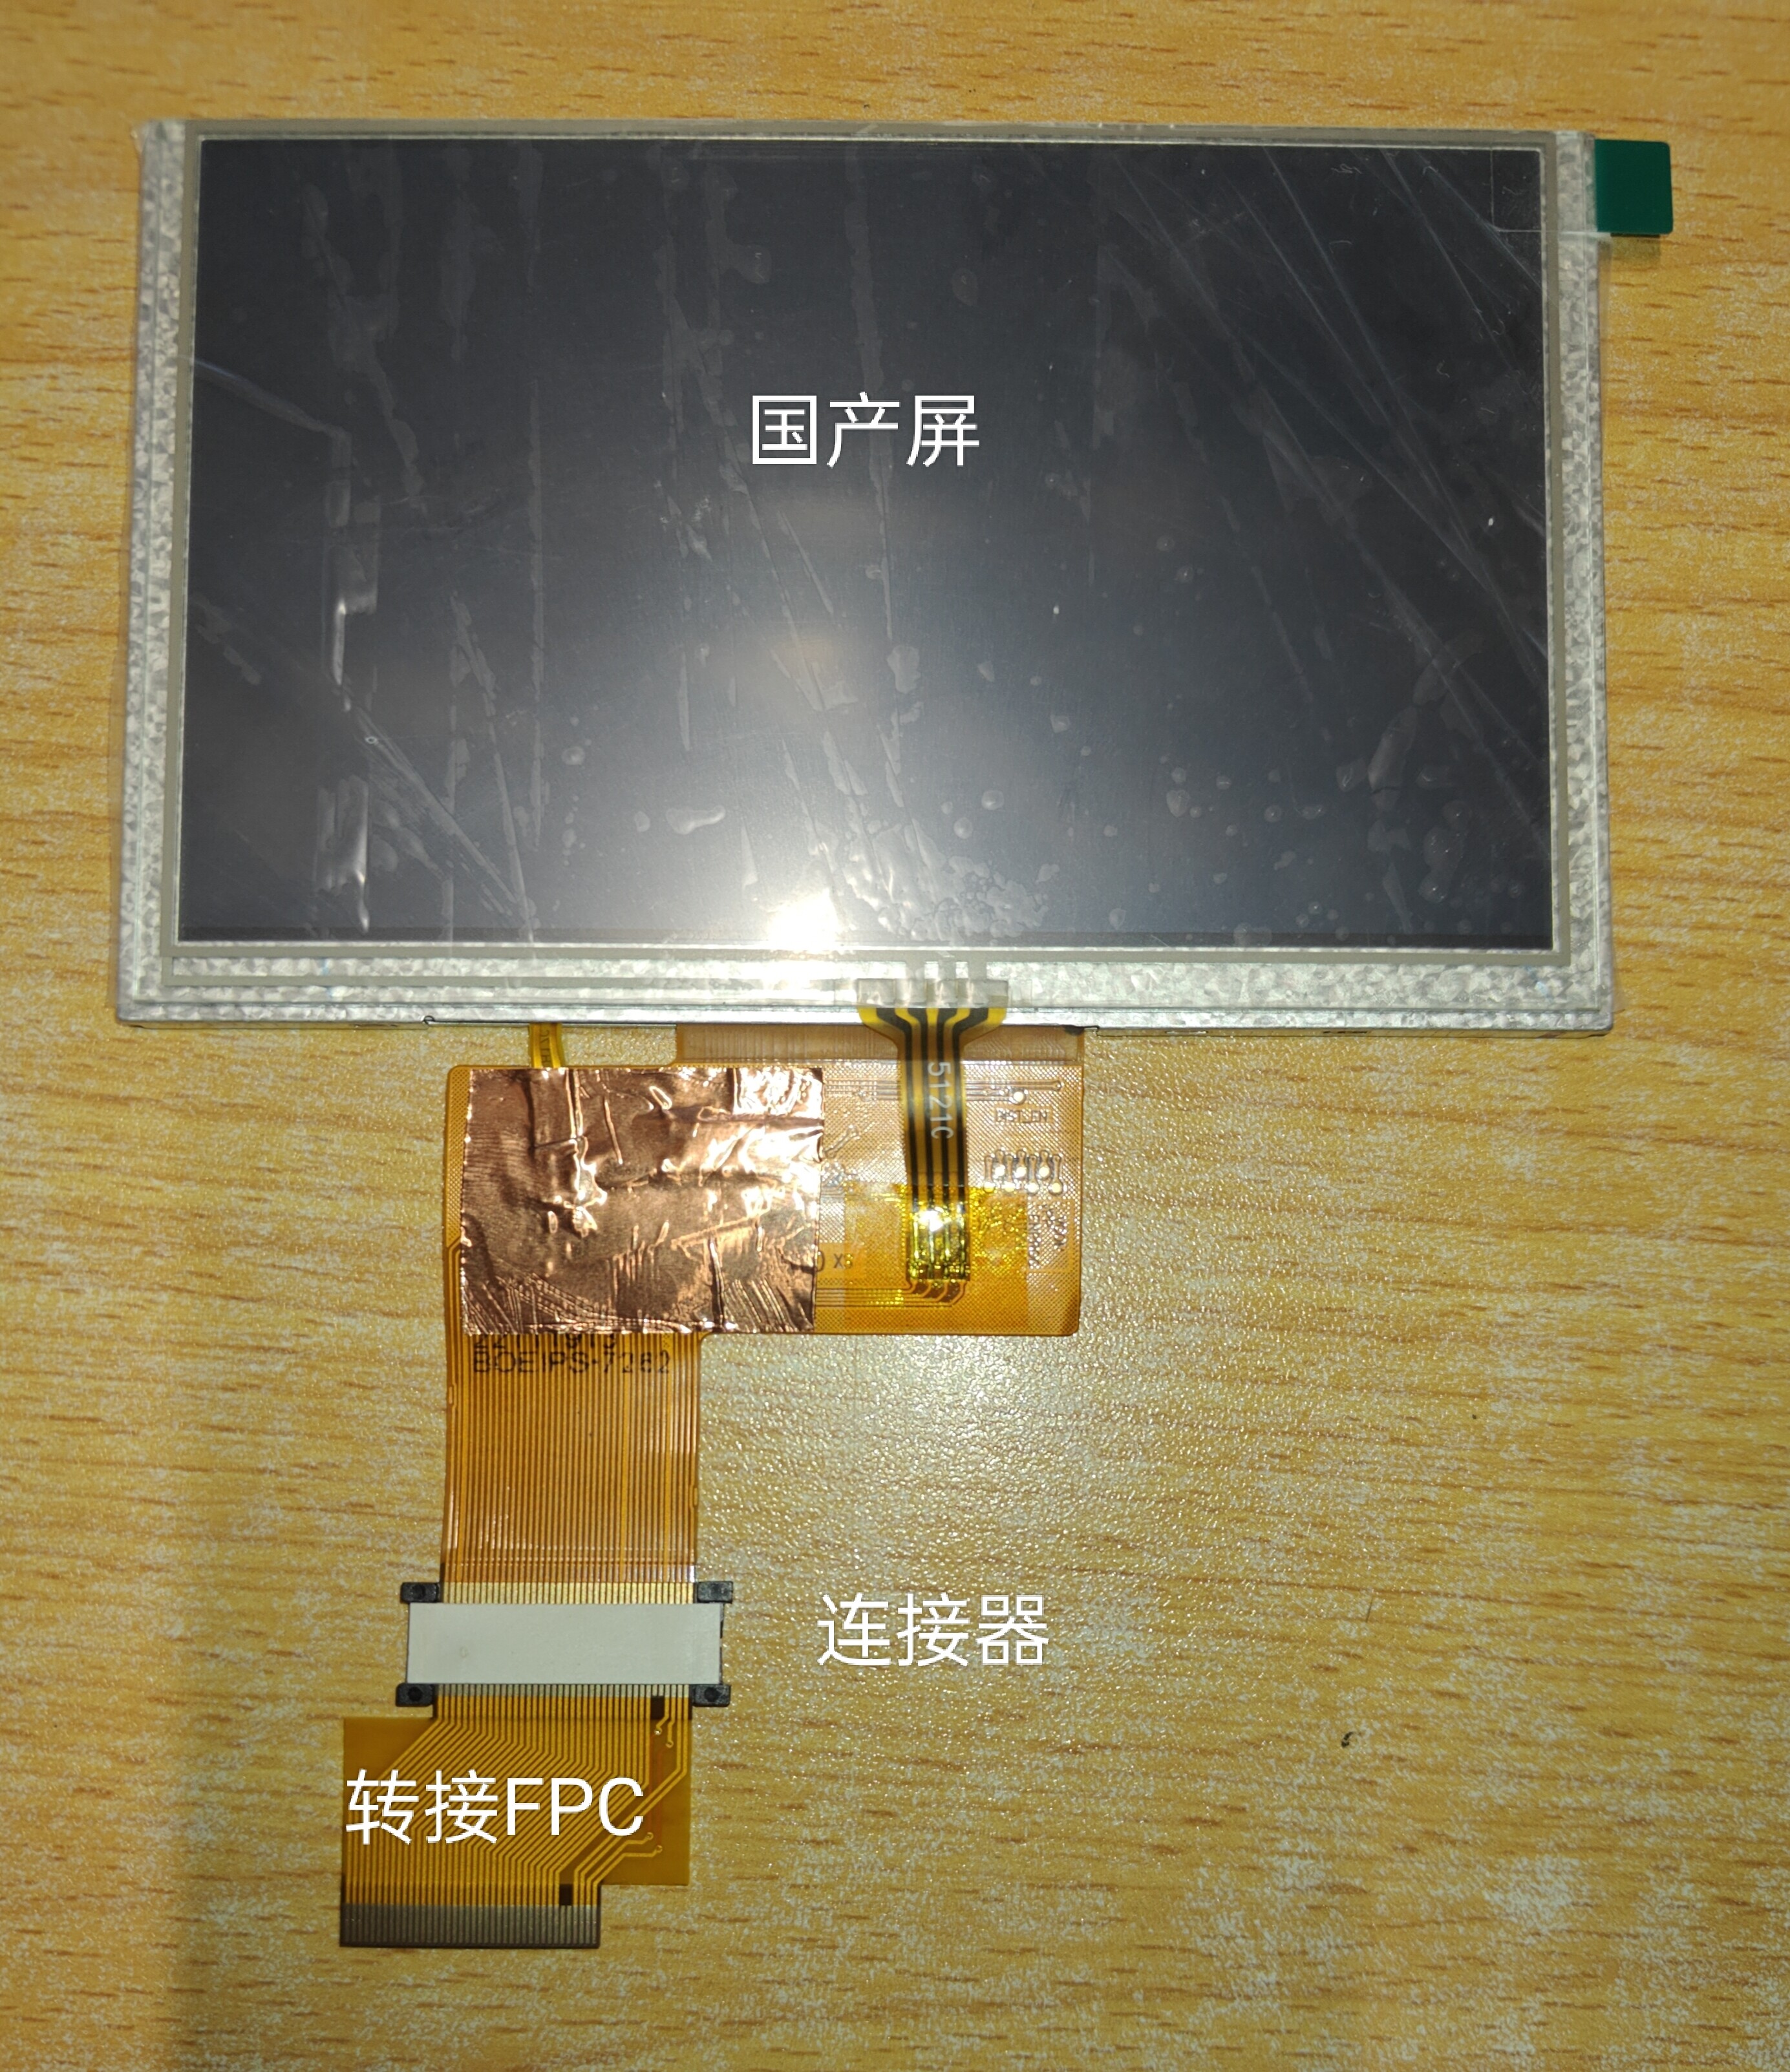
Comparison with the original screen:
There's a small detail: the original screen had a copper foil applied to the FPC, used for shielding. Of course, the copper foil itself conducts electricity, so a high-temperature adhesive tape was also applied on top of it for insulation.
The final cable should be longer than the original one. When installing, make sure to neatly arrange it and avoid forcing any bends; simply allow the cable to form a curved shape.
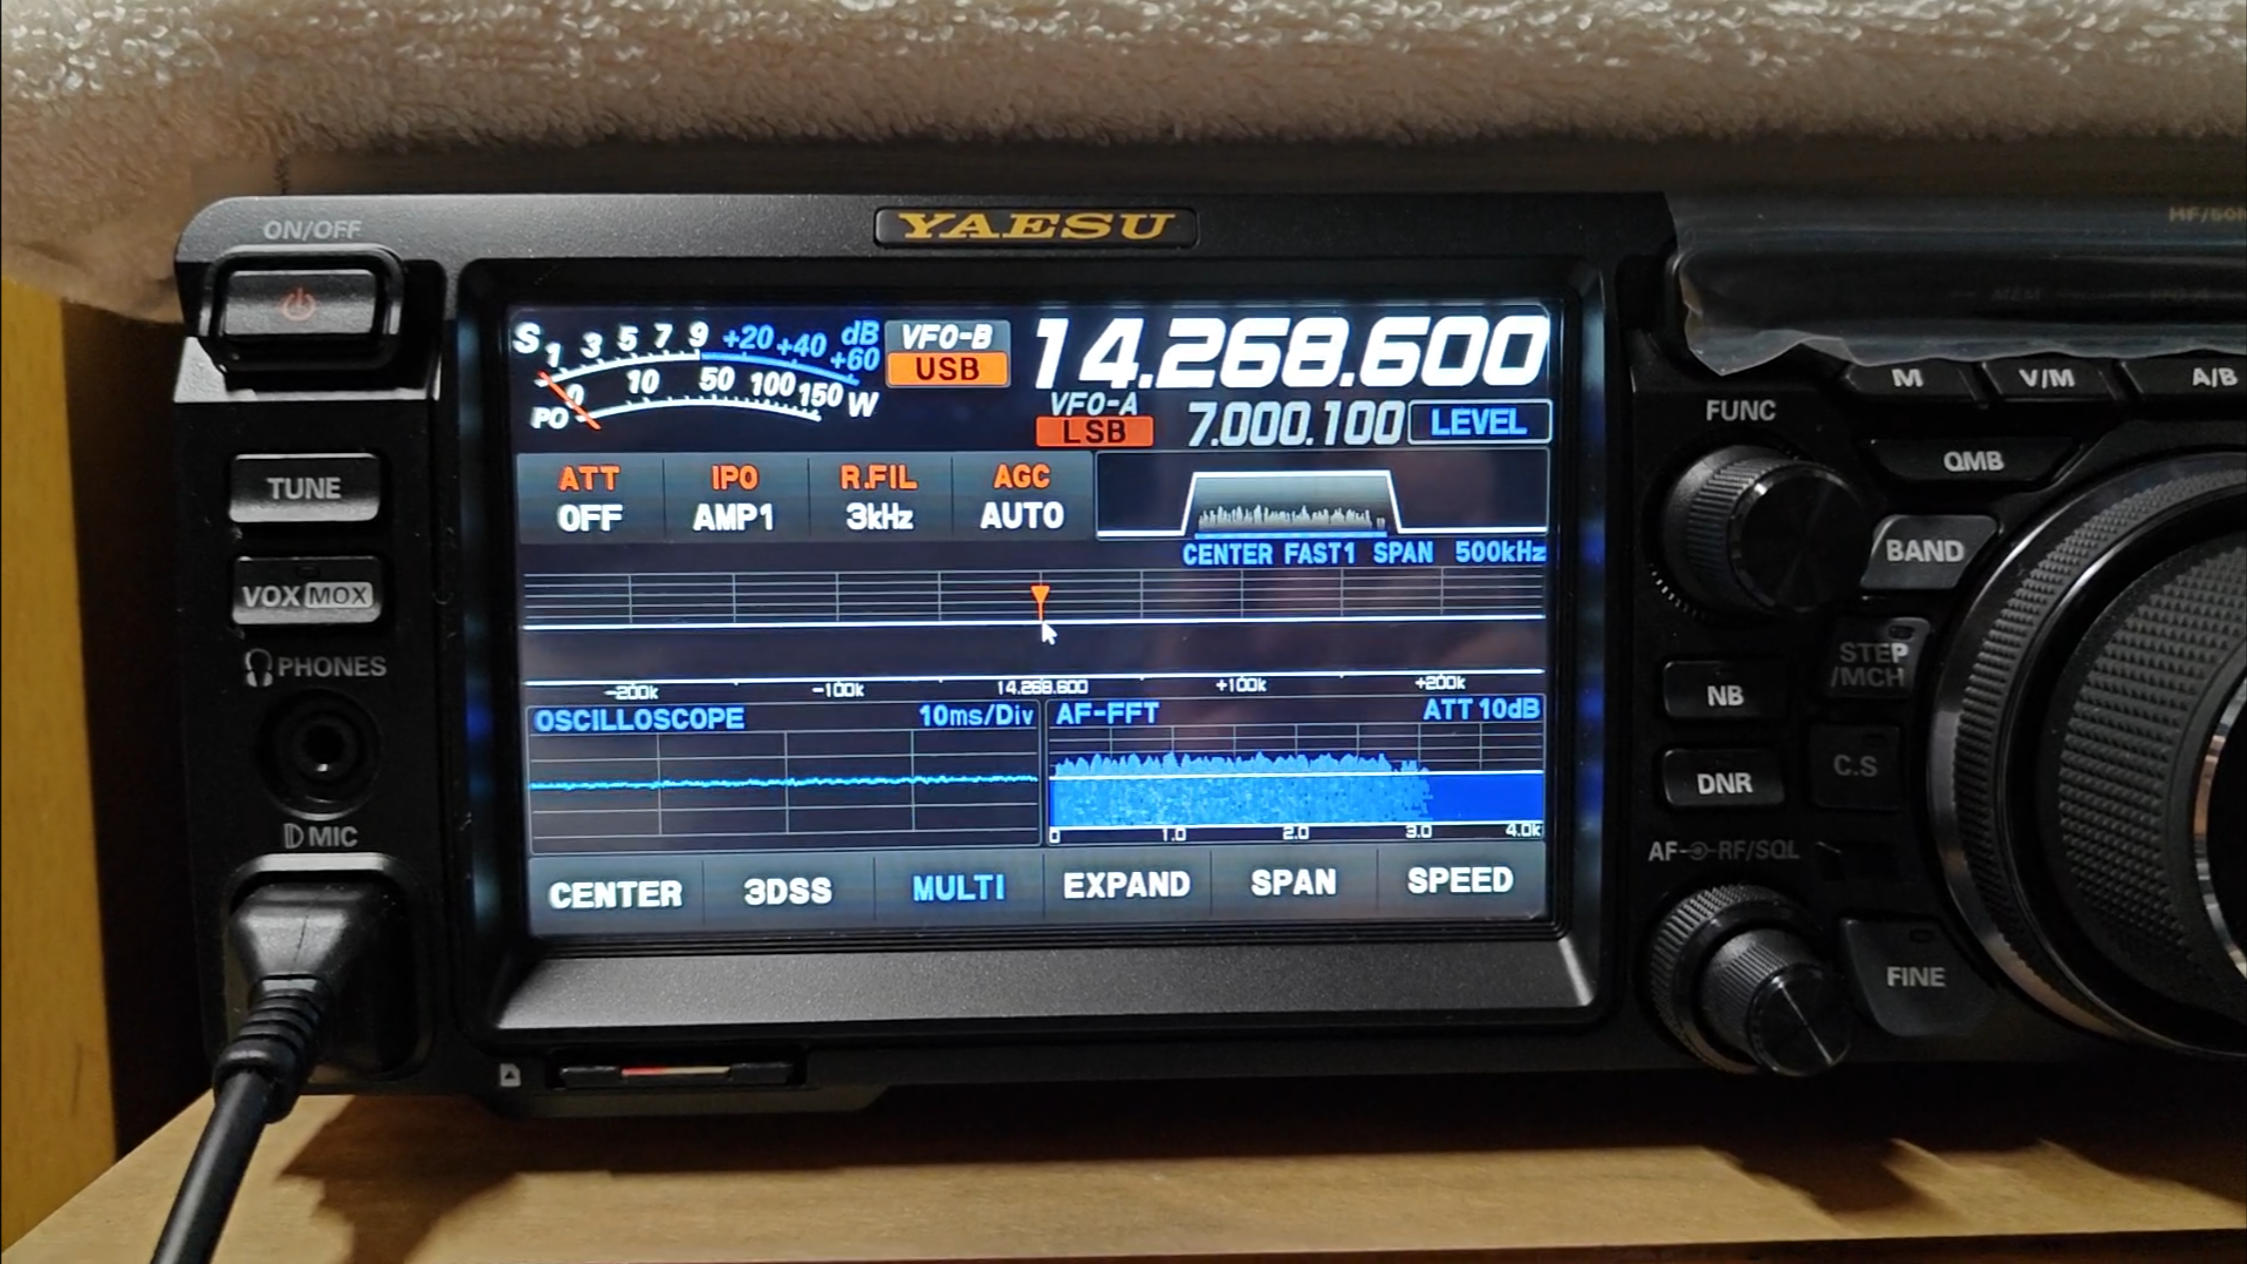
The actual effect is shown in the image. The screen itself is from JD, and it seems to have a more vivid appearance. In comparison, the original screen has a slightly grayish or whitish appearance, which can provide a brighter visual effect:
The engineering documents for the cable were uploaded to a personal website. If Luckin doesn't have any free coupons, you can go to Taobao and order a sample from Jia Li Chuang for 1 yuan. The total cost of a single screen is around 70 yuan, which is only 1/10 of the price of the original screen. After half a year of use, the experience is consistent with the original screen.
(As a final suggestion, you can apply a protective film during daily use to enhance the viewing experience while also preventing damage to the resistor screen's coating.)
 闽ICP备2021006864号-7
 闽公网安备35020602002794号